
|
|
Laptop hard drives constantly load and unload in case the computer is jarred to prevent damage to the hard drive. However, with Linux, hard drives load and unload so frequently (unless you enable laptop mode) that they wear out very quickly. They also make obnoxious clicking noises while doing this. There are two tools you can use to check and see if your hard drive is on its way to self-destruction. The first is smartctl. smartctl lets you examine various statistics that are recorded by your hard drive. The "-a" option displays all of the statistics for a drive. Here's a typical smartctl invocation:
sudo smartctl -a /dev/sdaIn the output you will see a line for "Load_Cycle_Count". Try checking that periodically over the course of a week and see if it is going up rapidly (more than 25 per day is too many). If so, you need to try disabling the drive's power management features to avoid premature failure.
The second hard drive utility that comes in handy for fixing Load_Cycle_Count issues is hdparm. The "-B" option to hdparm lets you examine or set the APM mode of a hard drive. To examine the APM setting of a drive:
sudo hdparm -B /dev/sdaThe setting is simply a number from 0 to 255. Typically, 0 means aggressive APM; the hard drive will load and unload constantly. This is not good. 254 usually means least aggressive APM, while 255 usually means to turn APM off. You can set the APM value like this:
sudo hdparm -B 254 /dev/sdaIf you happen to have a Western Digital drive, and the above doesn't seem to fix the problem, your drive might have IntelliPark and you need to disable the Idle 3 timer. First, you can check the value with:
sudo idle3ctl /dev/sdaThis will either tell you that the timer is set to a value, or it will tell you that the timer is disabled. If you get a value, then try disabling the timer:
sudo idle3ctl -d /dev/sdaThen you will need to turn off the computer completely (restarting is not enough) and turn it back on. This worked for me with a WD5000BPKT (Caviar Black) drive.
There is no guarantee that any of these will work. It's best to try them and then keep an eye on the Load_Cycle_Count to see if it has stopped increasing. Who knows what wonderful technology the hard drive makers will come up with next to reduce the lifespan of their drives. Class action anyone?
Seems like the manufacturers are now shipping their drives with APM set to 254, and the drives remember this across power cycles, so things have improved a bit. The problem now is Western Digital and their Idle 3/IntelliPark feature. It's always something.
When I first loaded 9.04, it appeared that my hard drive's APM was off even without me adding an hdparm line to the rc.local. However, after a few months I noticed that the Load_Cycle_Count was indeed increasing. So I followed the 8.10 instructions below and all is well now. I recommend getting familiar with the output of "smartctl -A" and noting if any values like "Load_Cycle_Count" are increasing and the drive is making any funny clicking noises when it is not in use. If so, some investigation is in order.
Fixing this turned out to be straightforward. My drive responded correctly to the following command which effectively disables APM:
hdparm -B 254 /dev/sdaThe trick was to get this to happen both at boot, and after a suspend or hibernate. Adding it to /etc/rc.local did the trick for boot time, and the following script called /etc/pm/sleep.d/hdparm.sh handles suspend and hibernate (see "man pm-suspend" for more):
#!/bin/sh
# Make sure hard drive APM is off upon thaw and resume.
# See also /etc/rc.local

case "$1" in
	hibernate|suspend)
		exit $NA
		;;
	thaw|resume)
		hdparm -B 254 /dev/sda
		;;
	*) exit $NA
		;;
esac
Note: There is also a /etc/hdparm.conf file where you can put this APM setting. I've not tried this, but it might be simpler if it works. Be sure to test rebooting and suspending if you go this way. I've read that hdparm.conf has no effect on resume, so proceed carefully.
Before connecting directly to the Internet, it is a good idea to make sure your system is properly firewalled. I've been using Ubuntu's ufw which makes enabling the firewall very easy. There's also gufw, a graphical interface to ufw.
For the most part, a default Ubuntu install is pretty safe without a firewall, but if you want the added peace of mind, try ufw, then test your system with nmap (as root) from another computer on a private LAN. Note that nmap will indicate "filtered" for your ports if everything is locked down. Also try Gibson Research (www.grc.com) which has a port scanning test (called "ShieldsUP!") once you are online. Of course, if you are behind a hardware firewall, it's going to test that, not your computer's firewall.
I used to use easyfwgen which also worked fine for me.
Ubuntu cleans up /tmp every time you boot. This can be annoying if you like to use /tmp for working on things temporarily. In /etc/default/rcS there is a "TMPTIME" variable which sets the number of days old a file must be before it is deleted from /tmp. I set this to 15.
Since there are legal issues surrounding decoding DVDs, Ubuntu does not come with support for DVD playback. You have to either install it on your own, or you can also buy it if you want to be technically legal.
Canonical sells the Fluendo Complete Playback Pack for about US$40. Buy it and install it, and all should be well. It is notable, however, that this doesn't appear to provide an mp3 encoder. You'll have to grab either LAME (see "Ripping CD's to mp3" below) or the Fraunhofer encoder. The Fraunhofer encoder is free for personal use and 100% legal. LAME is iffy, but since Fraunhofer is free, shouldn't LAME also be?
For 10.04, and maybe 9.10, totem-xine is no longer supported. So you've got to do DVDs with gstreamer. Here's what I did:
sudo apt-get update

sudo apt-get install ubuntu-restricted-extras

sudo /usr/share/doc/libdvdread4/install-css.sh

(reboot) [might be unnecessary]Here's how I did it for Ubuntu 9.04:
sudo aptitude update

sudo aptitude install ubuntu-restricted-extras

sudo /usr/share/doc/libdvdread4/install-css.sh

sudo aptitude install totem-xine

sudo update-alternatives --config totem

(select "xine" which is #2)

(reboot)
Using this method we've been able to play DVDs from region 1 and region 2. I think this essentially gives you a region-free DVD player.
This worked in Ubuntu 8.10.
Install all the gstreamer stuff and "ubuntu restricted extras" (I had to use synaptic since it had to uninstall something). Then do this:
sudo aptitude install totem-xine libxine1-ffmpeg libdvdread3

sudo /usr/share/doc/libdvdread3/install-css.sh

sudo update-alternatives --config totem
And switch to xine. Next, reboot the machine, and Totem should be able to play DVD's.
That can probably be done cleaner, but I didn't realize I needed to reboot for changes to take effect. So I struggled a bit since it wasn't working. Try doing some of the above then rebooting. It might work better for you.
The above should have also set RhythmBox up to play mp3's. Be sure to test that before continuing.
Note that Totem has its own volume control in addition to the Master and PCM volume controls. Be sure to check them all if the volume seems low.
To get mp3 encoding, you'll need to install LAME by doing the following at a command prompt:
sudo apt-get install lameRhythmBox will then offer an "mp3" option in its settings. It will then rip CDs to 128kbps mp3 files. However, I didn't see an obvious way to just rip selected tracks with RhythmBox.
I've found that "asunder" is a better CD ripper. It lets you rip what you want, and it uses the older, more compatible id3v2.3 tag format. You can also try Sound Juicer, but as I recall, it uses id3v2.4 tags which can cause problems with older mp3 players.
June 2009: Just noted a problem with ripping CDs with RhythmBox. MP3 files made with RhythmBox are tagged with ID3 V2.4 tags. These newer format tags cannot be understood by the majority of existing mp3 players. The "problem" is in gstreamer's id3v2mux. There's a new id3tag plugin that supposedly allows one to write the old 2.3 tags. Problem is that it is very new, so it isn't in any distros yet. Annoying! It looks like easytags is a good solution. It can be configured to write 2.3 tags. Just bring up the files with 2.4 tags and resave them with easytags.
fbreader is a really nice ebook reader. If you don't see it in the menus, install it with synaptic.
If you're studying a foreign language and you need accents over your vowels (áéíóú), go to the keyboard layout selection (System | Preferences | Keyboard | Layouts) and switch to the "USA International (AltGr dead keys)" keyboard layout. This allows you to use the "Right-Alt" key to get accents and other special characters. Just hold down the right "Alt" key and press a vowel.
Also be sure to install the "myspell" dictionary for the language you are studying. E.g. myspell-es will give you the Spanish dictionary. With this installed, you can turn on Spanish spellchecking in OpenOffice.org.
|
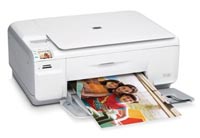
All of HP's modern printers are supported by the hplip project. Picked up the HP C4480 AIO at Staple's for $70. Scanner and printer work fine. It did take a little while for Linux to notice the new printer was attached, but once it did, all was fine.
Scanning works great. Two important things about GIMP/XSane and scanning... First, you can get to XSane through the GIMP by going to "File | Create | XSane". If your scanner isn't on the list in that menu, then select "Device menu" (I think?). That will let you pick your scanner. Second, some scanners can JPEG compress the data that they send over the USB wire. Obviously this is a very big "no-no" for serious photo scanning. In XSane, go to "Window | Show Advanced options". In there you'll see a compression setting (if your scanner supports this feature). Set it to "None". At first mine was set to JPEG with quality 10 (out of 100!). I was wondering why my scans looked terrible.
There are a lot of other little things you can set up to make life easier when scanning photos (e.g. default dpi and inches vs. centimeters). Be sure to spend some time going through all the menus in XSane to find out what's available.
6/24/2009: Just had a hilarious printer problem. I was getting the infamous "device descriptor read/64, error -71" in /var/log/syslog. After some research and fiddling around with usbcore parameters, I finally figured out it was a loose USB cable. Boy do I feel dumb. So, if the printer isn't working, be sure to pull the power plug, reseat the USB connectors, wait a minute or so, reconnect the power and try again. Pulling the power plug is a good extra step as these printers can get confused by power outages. Trying a different USB cable would also be a good idea in case you've got a bad one.
Additional lessons learned: Make sure you print something at least weekly or the heads dry up. There is no reliable way to bring the heads back to life once this happens. Unless you do a lot of printing, refilling the ink cartridges is a waste of time and money. You've got to refill the cartridges before they go empty (and there's no way to tell when that is) and the ink expires in two years anyway. If you're going through a cartridge a month, you can save big bucks refilling. If, like us, you go through a cartridge every two years, your ink will go bad before you can even use it.
You can have up to four primary partitions on a drive. If you need more, create an extended partition. I usually set up one for "/" and another for swap that is twice the RAM size (leaves enough room to hibernate if I'm ever feeling like throwing caution to the wind). But you could easily have one for Windows, one for your new "/", one for your old "/", and one for swap. I've had the best luck shuffling partitions using gparted from a live CD. Although the newer versions of Ubuntu seem to have more powerful partitioning ability during the install than before. Bear in mind that sometimes you need to turn the swap partition off before gparted will let you shuffle partitions.
August 2010 I upgraded from Ubuntu 9.04 to 10.04. As with the previous upgrade, gparted allowed me to shuffle around the partitions and keep the old install around in case anything happens.
May 2009 I upgraded from Ubuntu 8.10 to 9.04 by shrinking and moving the 8.10 partition and creating a new partition for 9.04 and doing a fresh install. Key to this was booting the Ubuntu 9.04 live CD and using gparted to move the partitions around. This worked well. I had much trouble with the Ubuntu installer's partitioning feature and parted so I will be avoiding those in the future. [Actually, they work a lot better as of Ubuntu 12.10. What a difference 4 years makes.]
Just do a "sudo apt-get install package-name" to get these.
Note that there are many ways to search for packages. The search button is Synaptic Package Manager is my favorite. Don't use "Quick Search" as it tends to return a jumble of results that are hard to sift through.
See my command reference for more packages.
Ubuntu - The most popular version of Linux.
<- Back to my Linux page.
Copyright ©2011, Ted Felix. Disclaimer