One of the main drawbacks of a single CCD digital camera is the presence of color aliasing in areas of high-contrast and fine detail. I was staring at resolution test targets when the solution came to me. If you desaturate the image, the color aliasing goes away. If the area of the image is black and white, that's all you need to do. If it is in color, you can use the "colorize" option in the Hue/Saturation dialog.
Color aliasing is caused by the color filters on a single CCD camera. A small white line on a black background that registers on individual pixels in a CCD will be interpreted as a line containing single pixels of each of the primary colors registered. Obviously, this isn't what is wanted.
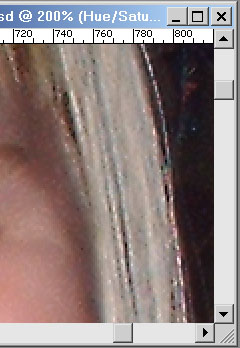
Here's an image that includes blonde hair, which typically falls victim to color aliasing.
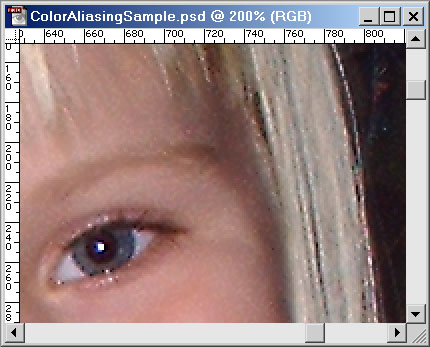
I shot this with a Fuji FinePix 1300. You can see the color aliasing as splotches of blue and red in the hair.
Select the eye dropper tool, then set it to 5 by 5 sample mode by right clicking in the image, and selecting "5 by 5 Average". Now sample the area that needs fixing. The color aliasing will make this difficult, so we will further refine the color selection in step 2.
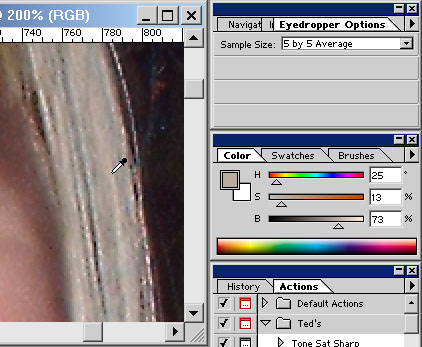
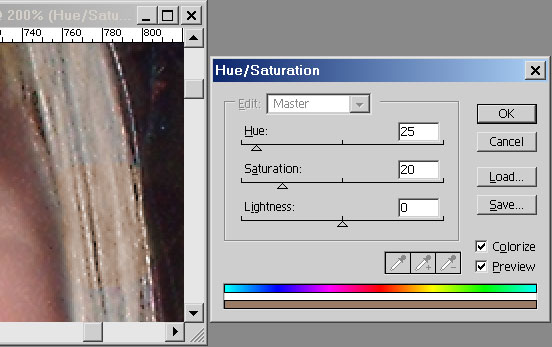
Be sure your Color palette is set to HSB sliders mode to make color matching easier.
Create a new Hue/Saturation adjustment layer (Layer | New | Adjustment Layer..., set Type to "Hue/Saturation" and click Ok). Enter in the Hue and Saturation numbers from the Color palette. In our case, 25 and 13. Click the "Colorize" check box to turn on Colorize mode.
Fill the mask for this adjustment layer with black, then select the paintbrush tool, and set the color to white. Mask in a portion of the color aliased area.
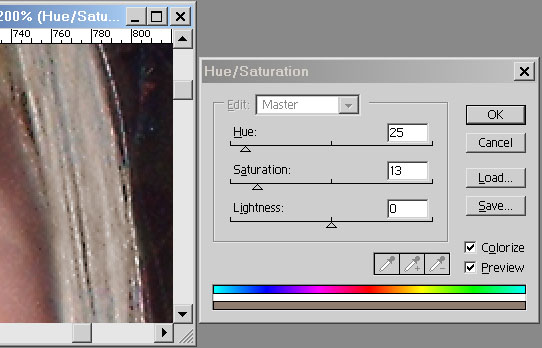
We got lucky. In this case it appears that the color is perfect. If it hadn't been, we could have used the hue and saturation sliders to change the colorized area until it was just right. I've found it best to start with the saturation slider first. Once you have a good saturation match, you can try shifting the Hue until the color is perfect. Here's an example with the saturation a bit off. You can see the masked-in area clearly.
With the white paintbrush, we can now mask in the rest of the color aliased area. When the area is fixed, merge the hue/saturation layer with the background by using "Merge Down" to make the changes permanent. Here's the "before" and "after":

Admittedly this could be a pretty painstaking task, but for the few really critical images I produce per year, I don't mind doing it at all. Fortunately color aliasing is most noticeable in large areas that are the same color. So it is pretty easy to identify those areas and fix them. The results are certainly worth the trouble.
Thanks to Robert Barnett for the following variation:
1) Load the image with the problem.
2) Make a copy of that layer so you have two.
3) Using Gaussian (sp?) Blur, blur the copy with a setting of between 2 and
5.
4) Switch the blurred images layer blending mode to color.
5) Flatten the image.
6) Presto your done.
This tends to lose saturation in small objects throughout the image. But that can be fixed by masking out the blurred layer completely, then masking in the areas that need fixing. This works very well and is significantly faster than my method.
Copyright ©2001, Ted Felix